Installation:
In your Library select Tools and download Source SDK.
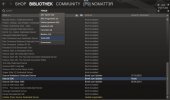
After finishing the installation, launch Source SDK.
Select on the bottom Enigne Version: Source Engine MP and Current Game: Counter-Strike: Source.
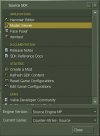
Now double-click on Model Viewer.
Opening a model:
Click on File and choose Load Model...
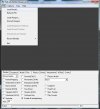
Navigate to the folder models and then player.
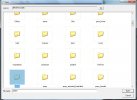
Now you can see every model which you have downloaded of your CS:S folder.
Select any model (.mdl) which you want to view.
Taking a screenshot:
Click on Options and select Make Screenshot...
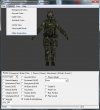
After entering the path and name, you have to wait until Source SDK has finished creating the screenshot. It will take some time.
DON'T DO ANYTHING NOW WITH YOUR COMPUTER!
Otherwise the file will be corrupted. A corrupted image looks like this:

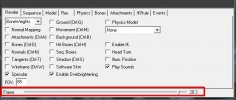
You can see when it has finished by looking on the Frame Bar on the bottom of Source SDK. If it moves again, Source SDK is done.
Converting the image:
You have to convert the created .tga file in a another type in order to upload it to our forum.
Open the file in an image viewer and save it as .jpg file. Furthermore, the file size is about 20 times smaller - the resolution stays.
Finally, you can insert the image into your post. You're done.
Troubleshooting: Corrupted image
If your screenshot is constantly corrupted, there's another possibility to make a screenshot by using Windows' print method.
Download irfanview (a very popular image viewer) and install it.
Open Source SDK and select your model.
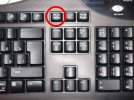
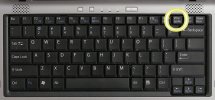
Press Prt Scr (=Print Screen) on your keyboard. Now you've made a screenshot of your desktop although you didn't see something happening.
Open irfanview, choose Edit and click on Paste. You can see the screenshot now.
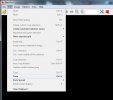
Create a box around the model.
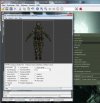
Click on Edit and select Crop selection.
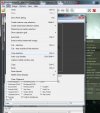
It looks like this:
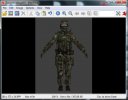
Now you can save the image by clicking on File and selecting Save as. Take .jpg as file type.
Insert the image into your post.
In your Library select Tools and download Source SDK.

After finishing the installation, launch Source SDK.
Select on the bottom Enigne Version: Source Engine MP and Current Game: Counter-Strike: Source.

Now double-click on Model Viewer.
Opening a model:
Click on File and choose Load Model...

Navigate to the folder models and then player.

Now you can see every model which you have downloaded of your CS:S folder.
Select any model (.mdl) which you want to view.
Taking a screenshot:
Click on Options and select Make Screenshot...

After entering the path and name, you have to wait until Source SDK has finished creating the screenshot. It will take some time.
DON'T DO ANYTHING NOW WITH YOUR COMPUTER!
Otherwise the file will be corrupted. A corrupted image looks like this:

You can see when it has finished by looking on the Frame Bar on the bottom of Source SDK. If it moves again, Source SDK is done.

Converting the image:
You have to convert the created .tga file in a another type in order to upload it to our forum.
Open the file in an image viewer and save it as .jpg file. Furthermore, the file size is about 20 times smaller - the resolution stays.
Finally, you can insert the image into your post. You're done.
Troubleshooting: Corrupted image
If your screenshot is constantly corrupted, there's another possibility to make a screenshot by using Windows' print method.
Download irfanview (a very popular image viewer) and install it.
Open Source SDK and select your model.
Press Prt Scr (=Print Screen) on your keyboard. Now you've made a screenshot of your desktop although you didn't see something happening.


Open irfanview, choose Edit and click on Paste. You can see the screenshot now.

Create a box around the model.

Click on Edit and select Crop selection.

It looks like this:

Now you can save the image by clicking on File and selecting Save as. Take .jpg as file type.
Insert the image into your post.
